
安装IDEA
下载和安装
略过安装过程,以下为社区版下载链接
下载链接:https://download-cdn.jetbrains.com/idea/ideaIC-2021.3.2.exe
安装Spring插件
安装好之后如果部署Spring项目可以先安装Spring Assistant插件,在Fils->Settings有如下插件页面,可以搜索Spring Initializr and Assistant

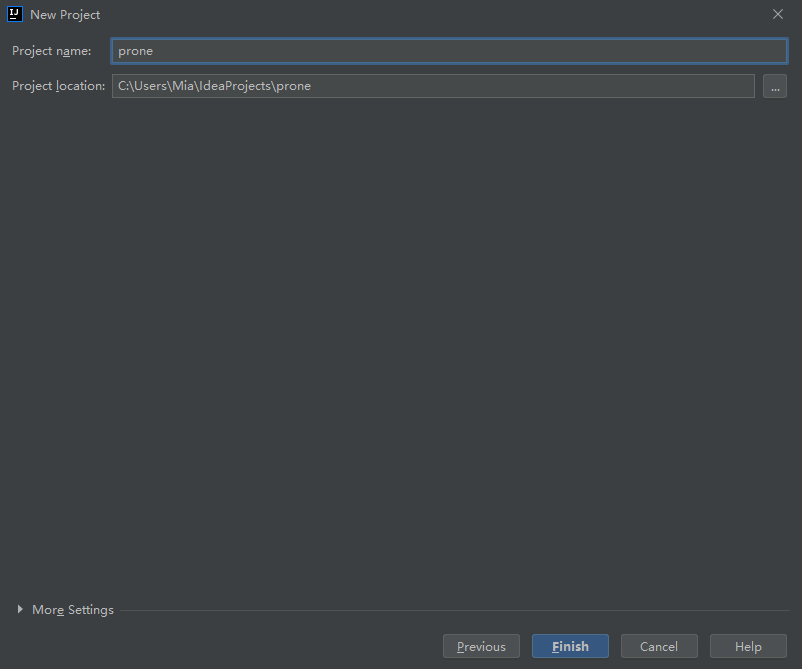
新建Web测试项目
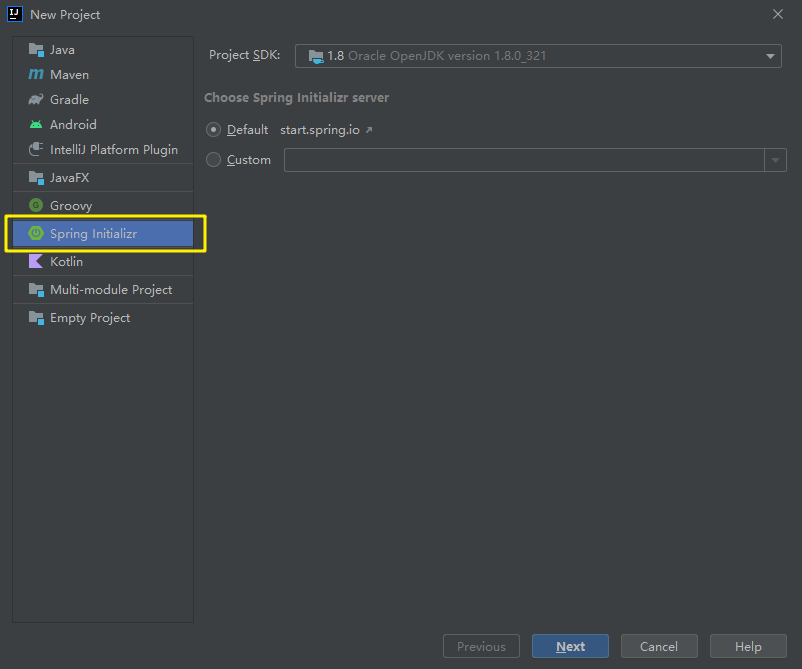
新建项目
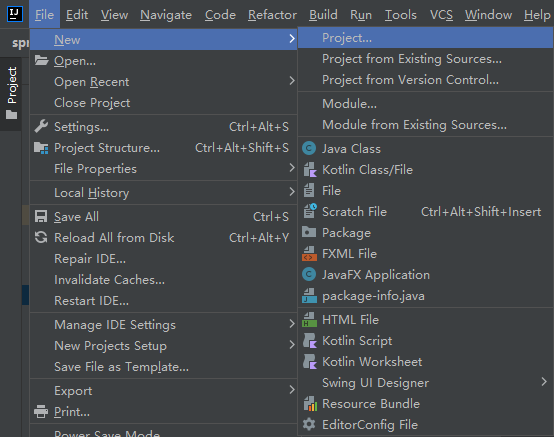
通过Spring助手创建
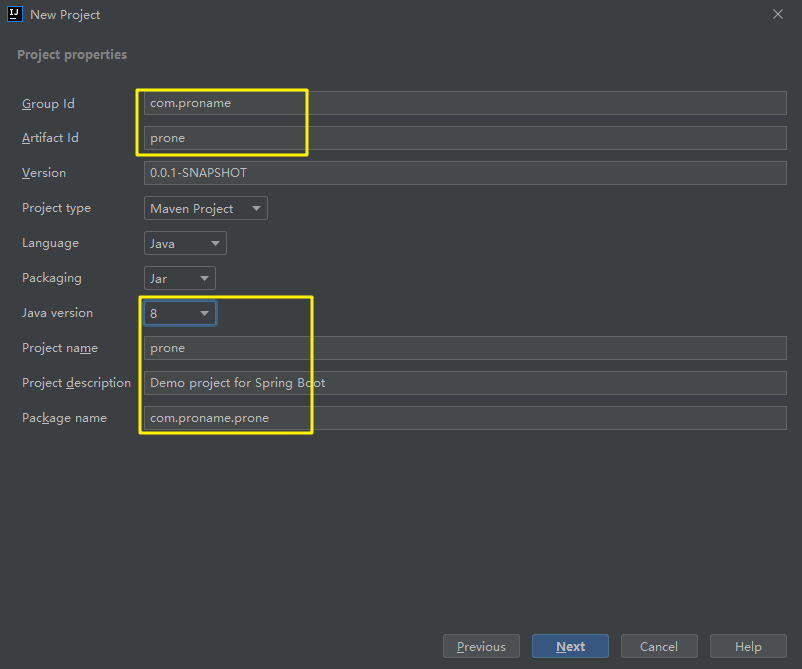
设置项目参数
框内的Artifact Id等参数信息都是自定义的,注意选择对应环境的Java版本
选择创建Web项目
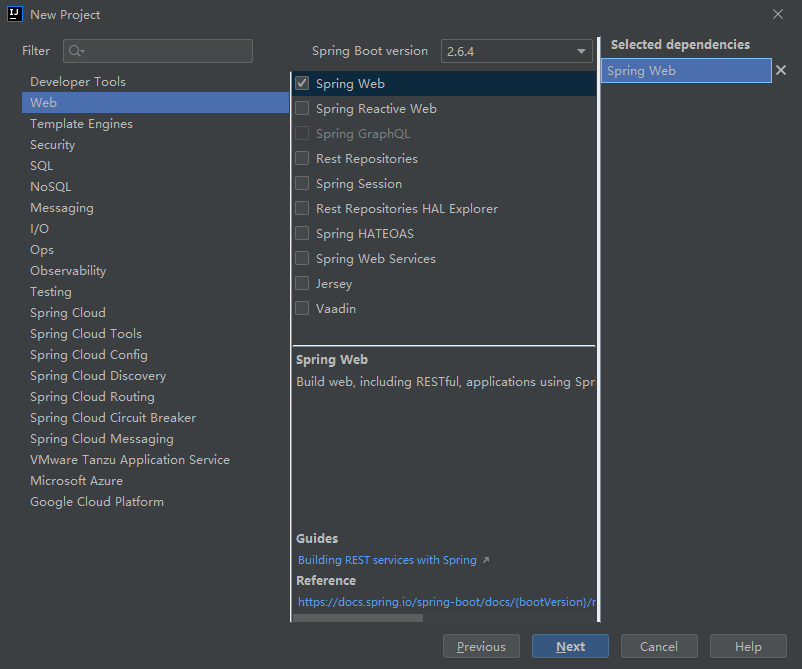
注意:此处有选择Spring Boot版本,Spring Cloud的版本和Spring Boot有依赖对应关系,最新的可参考此链接https://start.spring.io/actuator/info
Spring Boot与Spring Cloud依赖关系对照
{
    "git":
    {
        "branch": "7c26bdf60442fcb83869d308a3b7f14336860f1d",
        "commit":
        {
            "id": "7c26bdf",
            "time": "2022-03-07T16:58:26Z"
        }
    },
    "build":
    {
        "version": "0.0.1-SNAPSHOT",
        "artifact": "start-site",
        "versions":
        {
            "spring-boot": "2.6.4",
            "initializr": "0.13.0-SNAPSHOT"
        },
        "name": "start.spring.io website",
        "time": "2022-03-07T16:59:12.440Z",
        "group": "io.spring.start"
    },
    "bom-ranges":
    {
        "spring-cloud":
        {
            "Hoxton.SR12": "Spring Boot >=2.2.0.RELEASE and <2.4.0.M1",
            "2020.0.5": "Spring Boot >=2.4.0.M1 and <2.6.0-M1",
            "2021.0.0-M1": "Spring Boot >=2.6.0-M1 and <2.6.0-M3",
            "2021.0.0-M3": "Spring Boot >=2.6.0-M3 and <2.6.0-RC1",
            "2021.0.0-RC1": "Spring Boot >=2.6.0-RC1 and <2.6.1",
            "2021.0.1": "Spring Boot >=2.6.1 and <2.6.5-SNAPSHOT",
            "2021.0.2-SNAPSHOT": "Spring Boot >=2.6.5-SNAPSHOT and <3.0.0-M1",
            "2022.0.0-M1": "Spring Boot >=3.0.0-M1 and <3.1.0-M1"
        },
        "spring-cloud-gcp":
        {
            "2.0.8": "Spring Boot >=2.4.0-M1 and <2.6.0-M1",
            "3.1.0": "Spring Boot >=2.6.0-M1 and <2.7.0-M1"
        },
        "spring-cloud-services":
        {
            "2.3.0.RELEASE": "Spring Boot >=2.3.0.RELEASE and <2.4.0-M1",
            "2.4.1": "Spring Boot >=2.4.0-M1 and <2.5.0-M1",
            "3.3.0": "Spring Boot >=2.5.0-M1 and <2.6.0-M1",
            "3.4.0": "Spring Boot >=2.6.0-M1 and <2.7.0-M1"
        }
    }
}
完成创建
创建入口函数
启动类和主函数的路径
src/main/java/{项目名称路径}
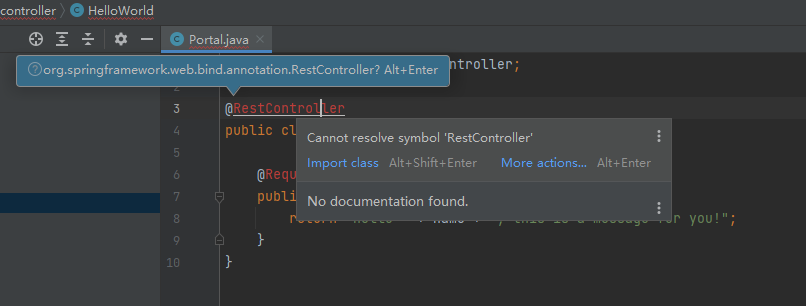
package com.proname.prone.controller;

import org.springframework.web.bind.annotation.RequestMapping;
import org.springframework.web.bind.annotation.RequestParam;
import org.springframework.web.bind.annotation.RestController;

@RestController
public class Portal {
    @RequestMapping("/hello")
    public String Hello(@RequestParam String name){
        return "Hello " + name + ", this is a message for you!";
    }
    @RequestMapping("/")
    public String Default(){
        return "Hello this is a default message!";
    }
}
提示:需要引入的函数可以通过Alt+Enter快速引入
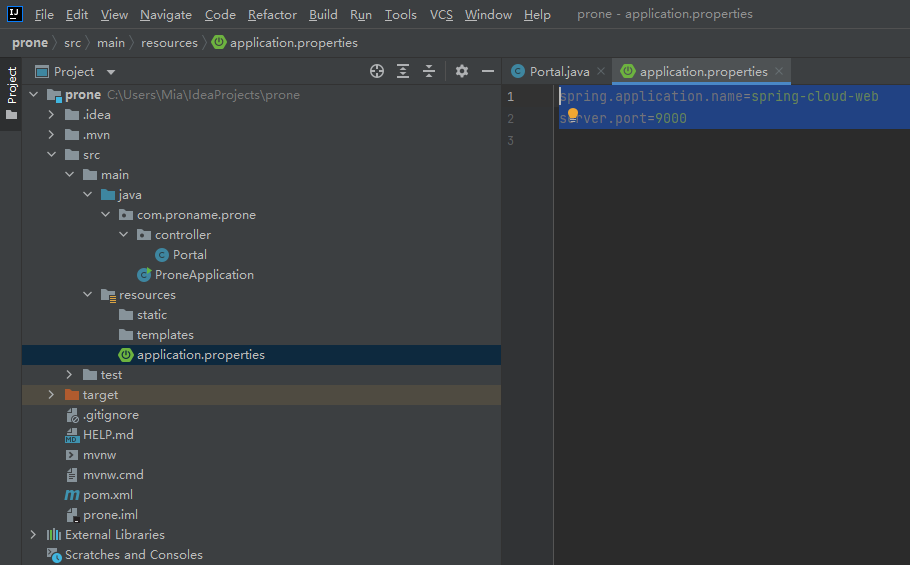
配置文件
{项目名称}\src\main\resourcesapplication.properties
配置名称和服务端口
spring.application.name=spring-cloud-web
server.port=9000
项目结构
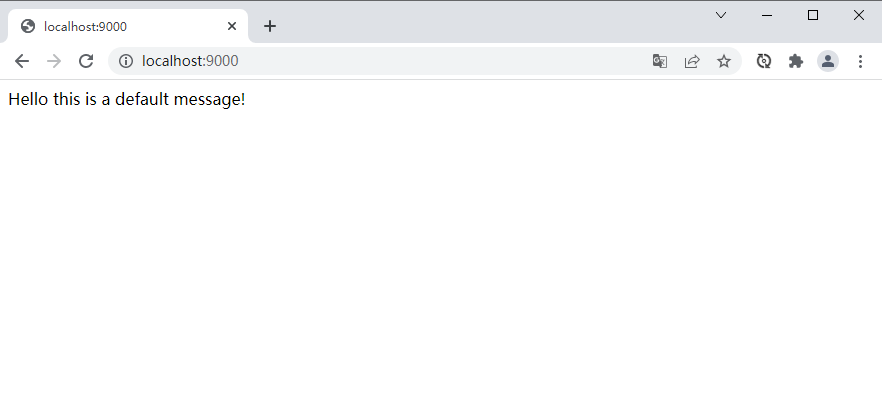
运行项目
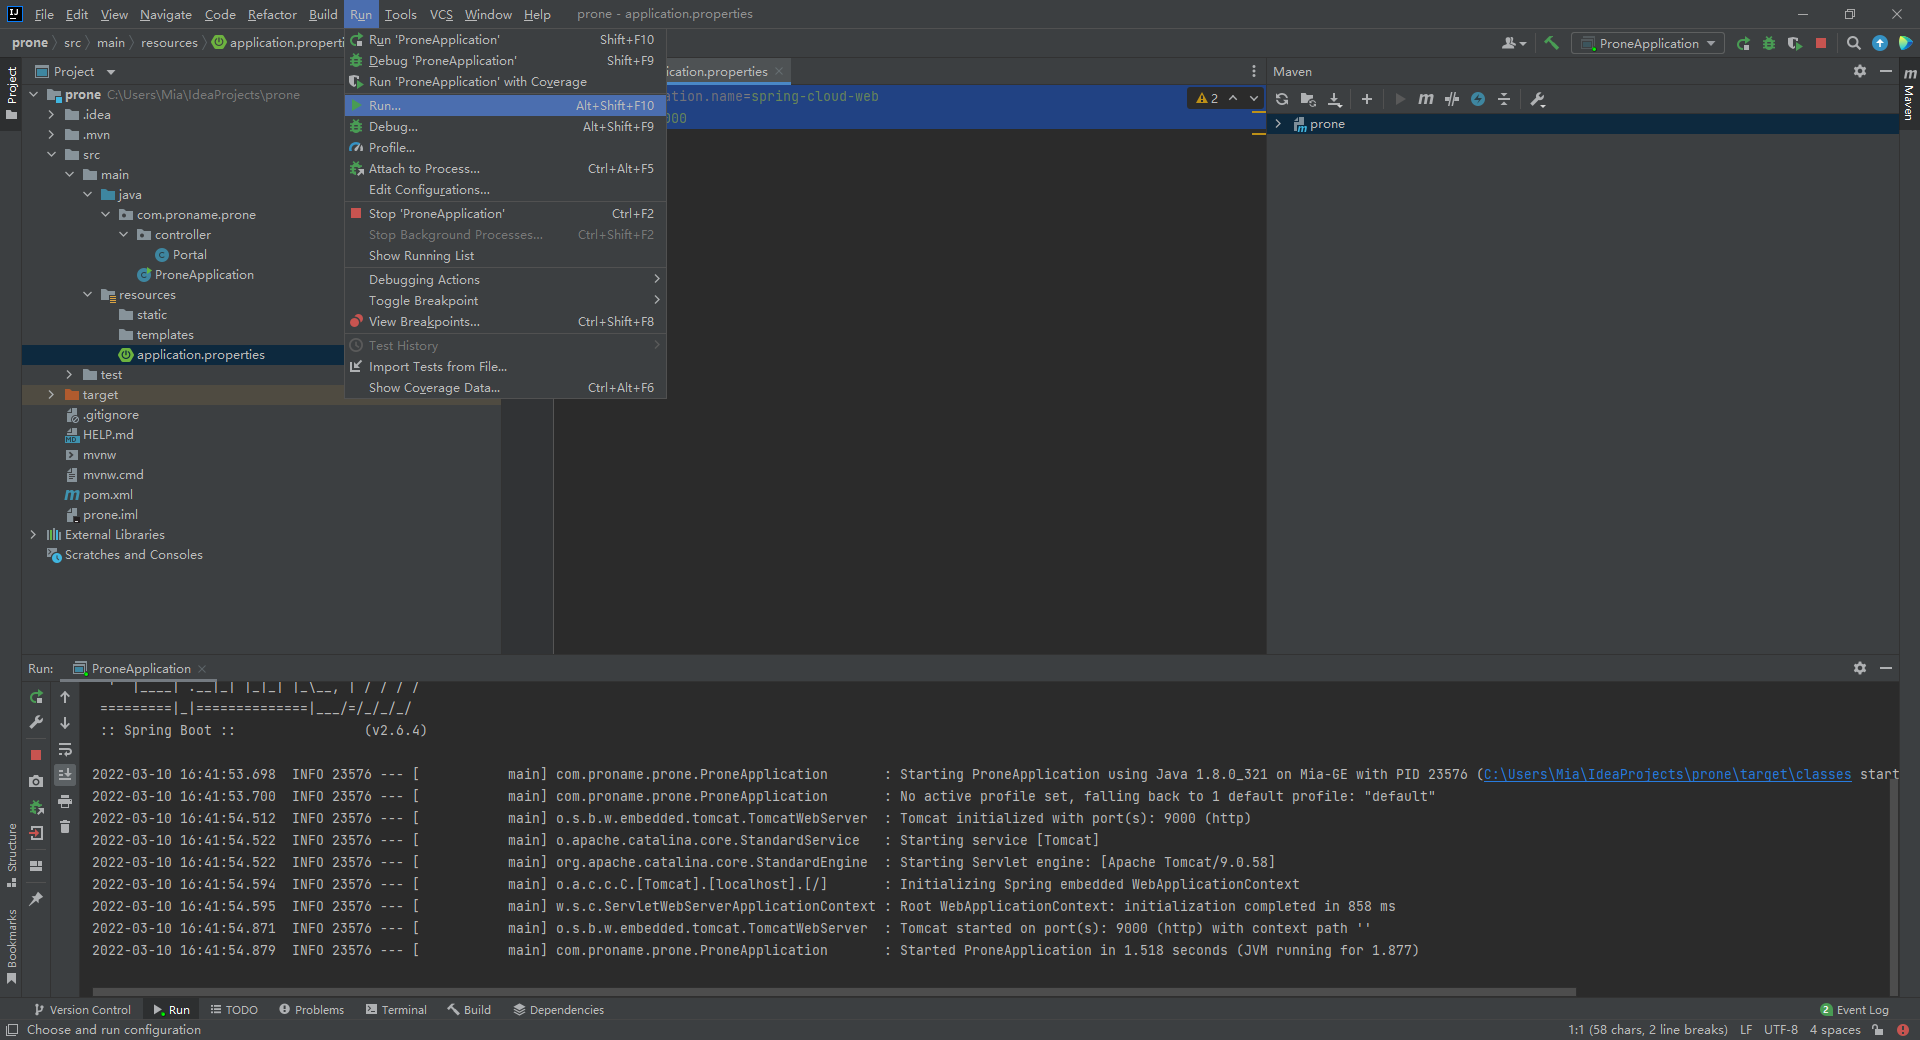
运行效果
pom.xml
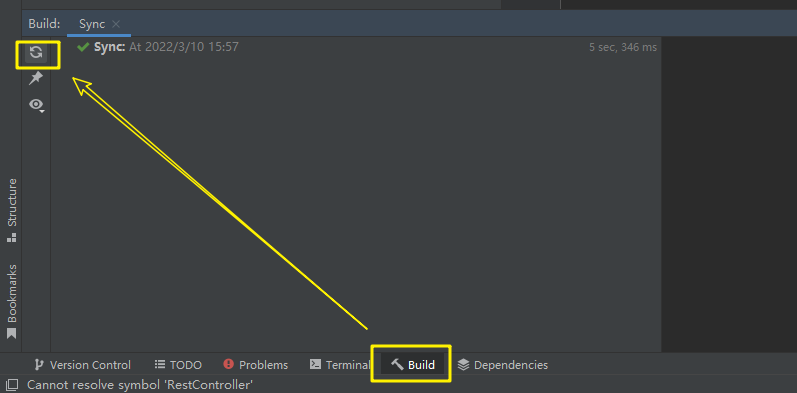
pom文件是项目相关依赖的说明,里面有很多版本配置信息和依赖的列表。
配置dependency依赖后最好进行Sync,下载相关依赖
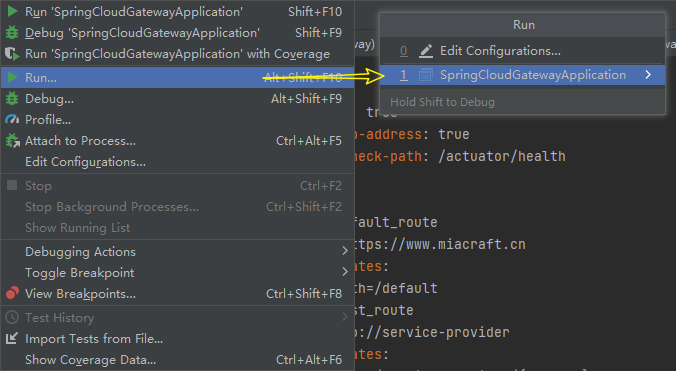
运行Run调试项目
Run项目
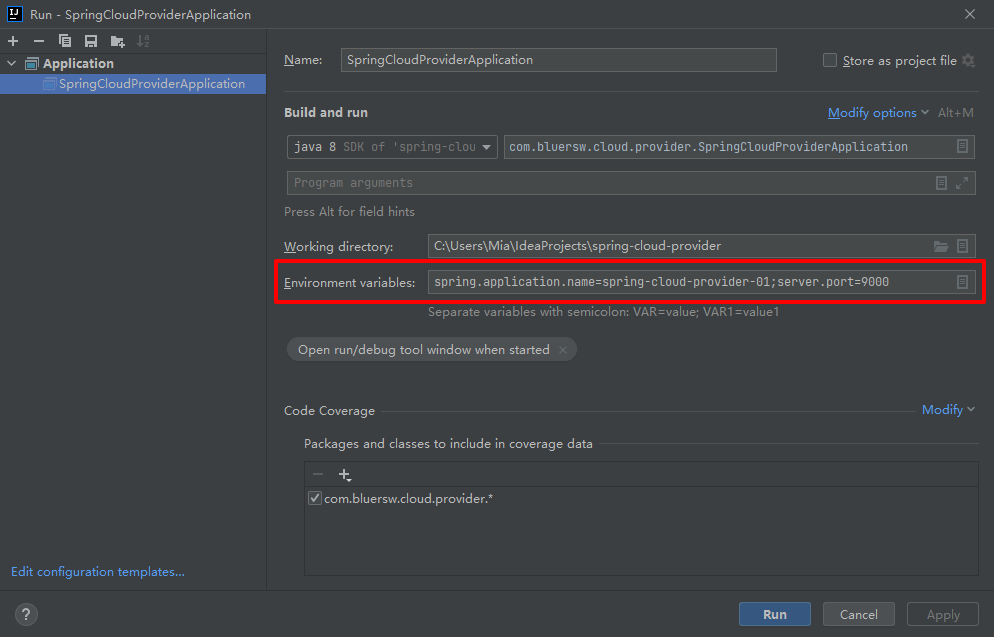
手动设置参数
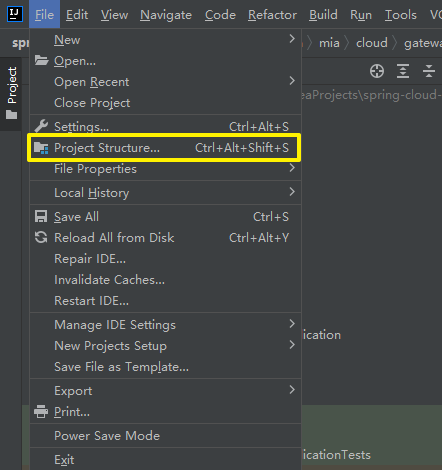
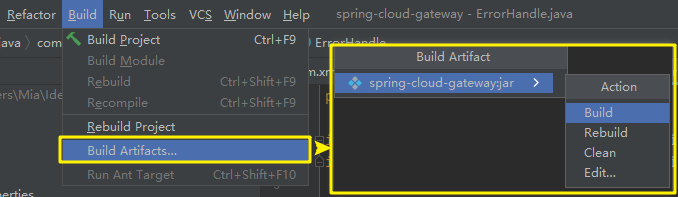
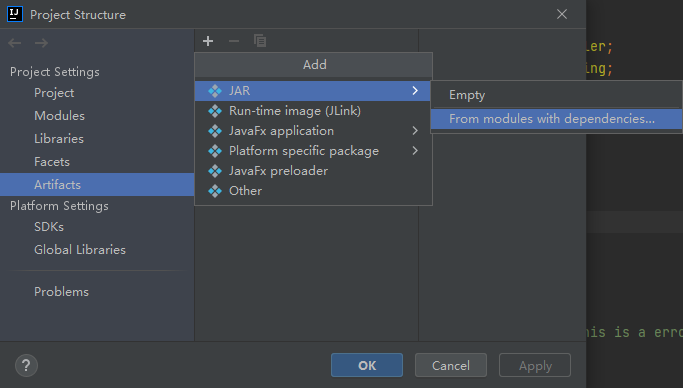
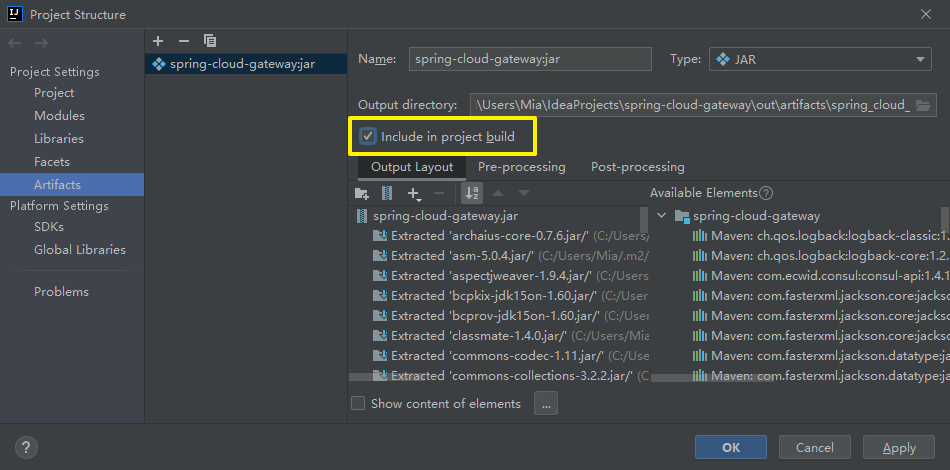
IDEA项目打包成JAR
有2种方式Maven和Build的方式,Maven会打包成一个JAR,Build会把依赖的JAR都拉出来(也可能是我不会配置),所以是一堆
使用Maven命令行
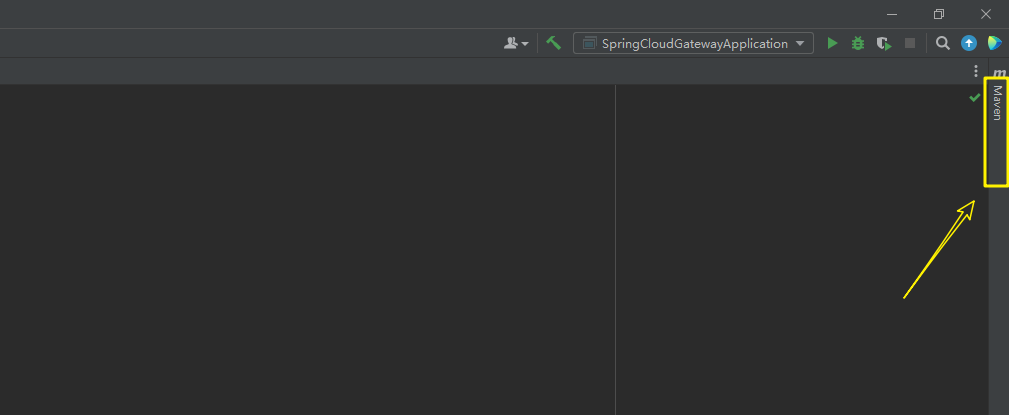
找到IDEA右上角的Maven窗口,在Lifecycle中使用相应的命令
可以先使用clean命令清除已创建的包,再使用package命令,打包后的包会在target目录中
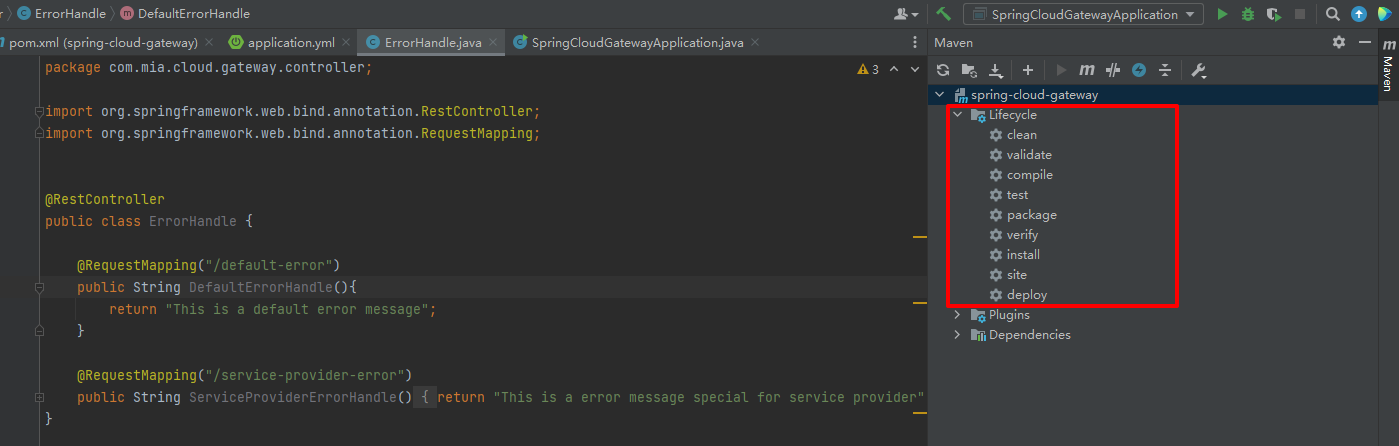
package、install和deploy命令的区别
package
完成了项目编译、单元测试、打包功能,但没有把打好的可执行(jar)包布署到本地maven仓库和远程maven私服仓库
install
完成了项目编译、单元测试、打包功能,同时把打好的可执行(jar)包布署到本地maven仓库,但没有布署到远程maven私服仓库
deploy
完成了项目编译、单元测试、打包功能,同时把打好的可执行(jar)包布署到本地maven仓库和远程maven私服仓库
常规Build

参考链接
Spring Cloud Gateway项目示例:
Docker部署Gateway,Consul集群Server+Client模式都有说明
https://github.com/sunweisheng/spring-cloud-example
Spring Cloud Gateway项目参考:
https://github.com/coltisa/Spring-Cloud
打包项目参考连接:https://www.jianshu.com/p/d18739004d6c
断路器机制:http://www.ityouknow.com/springcloud/2017/05/16/springcloud-hystrix.html
创建Spring项目参考链接:https://www.cnblogs.com/shijiaoyun/p/12889726.html
Docker部署Spring Cloud项目
https://blog.csdn.net/Weixiaohuai/article/details/105230536
Consul集群加入网关服务
https://www.cnblogs.com/bluersw/p/11610713.html
IDEA修改Maven源
https://blog.csdn.net/kangqiao0422/article/details/121270845

One comment
这个我在别的博主那里也有看到过